Showing posts with label diy projects. Show all posts

Monday, April 11, 2011

Dig Earth, Baby!


Earth Day is almost here and we're celebrating/learning on the days leading up to April 22nd.

We made nature bracelets and a tree bark transfer while on a nature walk. For this, you will need masking tape, construction paper and chalk or crayons.

For the bracelet, wrap a piece of tape around wrist - sticky side out. You can take a walk in your own yard, or hit the trails. As we took our walk, we collected things (flowers, grass, seeds) and stuck them on our bracelets one at a time (yes, mom had one too!). It was fun to talk about each thing and encourage her to find things on her own to add.


For the tree rubbing, tape your construction paper to a tree and make a texture transfer with chalk/crayon. We talked about the bark and it's rough texture, how it protects the tree and how it is part of God's earth given to us to care for.

Later, we taped our bracelets to the tree transfer paper & put them on display in a 'switch-out' cabinet frame. 


Through this walk, I talked about how God created the earth. To serve God, we should take care of  the earth and enjoy what He has created for us!

Cute
Not so cute
Unfortunately, I had to explain this sight to my girl. The reality already present to her, that not every person cares for earth the way they should. Not good to throw trash (or tires) outside in nature. She agreed with a "yucky, time out tire!" Luckily, trail clean up in our neighborhood is this month..so we'll be sure that it's disposed of properly (but...grrr!).

Here are some other things we plan on doing over the next week, to celebrate Earth Day!

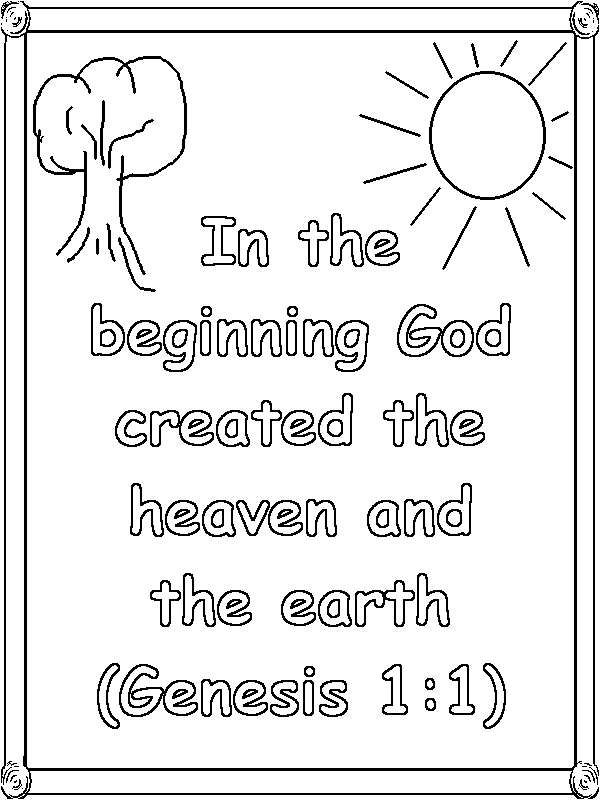
FREE Creation coloring pages (creation of the world as told in the Bible). I just love these, one for each of the seven days. Here's Day three.


Reading:
Big World Little Me. We like this book because it's easy to understand and fun. It tells that even one little person can make a big difference. Your local library may have this book (and others like this) in stock.
Read about the creation (Genesis), as told in the Bible (children's bibles with less words and pretty pictures).

Garden, plant flowers, seeds and trees. Get in the dirt together!


Learning how to recycle, sort.  It's never too early to start talking about the three R's (Reduce, Reuse, Recycle). There are lots of great 'How To's' (just google) that show you how to teach your children in fun/unique ways. One way is to do recycled crafts (see Repurpose Driven Life from my blog for ideas). 

We plan to make a milk carton bird feeder this week! Super easy. Google for your favorite and follow instructions.

And, of course...don't forget the yummy treats! These are cute rice crispy earth treats (click underlined link for details). 

If you want to use natural food coloring, you can use Indian Tree food coloring. It only comes in three colors, so you'll have to mix yellow and blue for green (fun to do with kiddo).

I hope everyone enjoys Earth Day and makes it productive, fun and special!


Sunday, April 3, 2011

Puppets in a Jamb

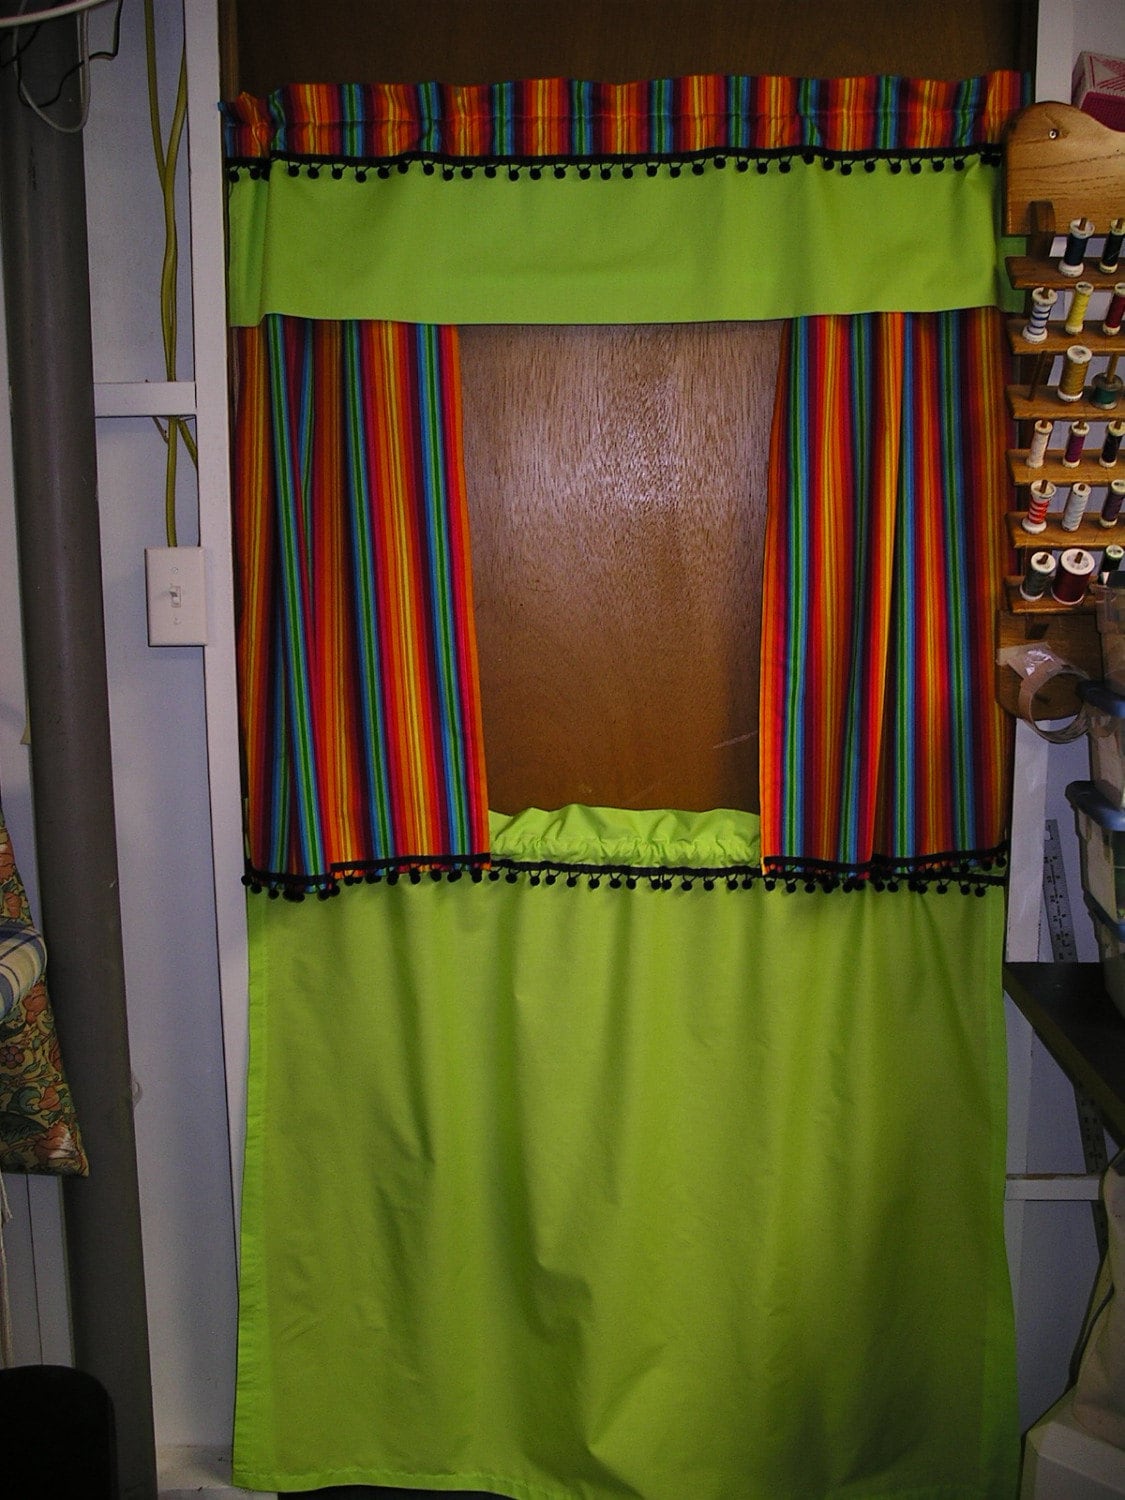
Our Homemade Doorway Puppet Theatre

Saw this idea a couple years ago & shoved it in my 'someday' folder. Slowly but surely I'm taking stuff from that folder and working on them (word of note: slooooowly).
Don't have a lot of space for a wooden puppet theatre/stand? Want something that can easily go up, be taken down and stored ?  Want a theatre that can grow with your child?
Then a doorway puppet theatre is for you!

You can buy them via retail ($50-$90). Or you can make them for under $20, or for FREE if you already have fabric and a tension rod. You can use sheets & curtains too.

There are a lot of DIY doorway puppet theatres out there...here's some visual inspiration.
Oooh


Ahhh- a good tutorial on this tent one too!


Cute on Etsy


So sweet, she actually sells many different themes too (Mommy Made it For Me site)


But this is my inspiration (from Country Living a few years back), below. They have a small tutorial on this one HERE. I just like that it's simple. Not using multiple tension rods, dowel rods or lots of fabric. Best of all, when you look at this picture, you think " Gee, that looks easy enough!"

puppet theater

I went less fancy, less time and skill. I used leftover fabrics and while I sewed most of it, I also used fabric glue where I didn't feel like sewing. I used fabric glue to adhere ribbon trim around the 'stage' opening (it was just easier!):


Fabric glued ribbon trim

My girl enjoying her new puppet theatre

So the Hippo says to the Robot...


I plan to add some Velcro to the inside bottom of the stage corners (or tabs), to eliminate any sagging of the stage (a 5 minute fix). You could also add a pocket & dowel rod to eliminate sagging. After seeing these pics, I realize I could have given it a quick iron out too!

 Total project cost was $0.Total project time was right under 4 hours.

This theatre does the trick and my girl is very happy with it - it's become a common bedtime routine request!

Wednesday, March 30, 2011

Misfits to Outfits


Those who know me understand my limits with patience. That being said, when I sew, I don't always measure, iron hems or use pins. I never do special seams, zippers, buttons or anything fancy. So, if I ever share a sewing type project (which I'm about to), the super detailed instructions will be missing. I will, however, try to provide helpful links that will make things less murky.

It seems that taking unwanted adult clothing and turning them into toddler clothing is all the rage lately. It's all over Etsy.com. It's now considered boutique (aka:pricey), one-of-a-kind sassy cute and of course, environmentally friendly.  It's too bad that when my mom made my clothing as a child (out of necessity), it was considered 'dorky'...at least that's what all the other kids told me. Okay, moving on...

I had this nautical style shirt that my husband someone accidentally shrunk (in defense of 'someone', there was also an ink stain on the sleeve...I think.).  :)P


 I thought it might make a cute little dress for my girl, especially since our family beach vacation is just around the corner!
 I just put it on her,  marked it, pulled the shoulder seams higher, cut it and sewed it. I used leftover fabric from the dress to make easy hair ties.  This took me less than 2 hours and it was free. I'm sure a professional seamstress would find great fault with this dress, but hey- I made it and it passes for cute!

This didn't turn out to be clothing, but it started that way. We were given this bunny dress. It was a garage sale find and while it was cute, it didn't fit.  


Rather than get rid of it , I cut out the little bunny face from the bottom and used it to make this quirky (but lovable) bunny for my girl . She's had it since she was 6 months old and it's her favorite. Makes me feel great to have made her something she loves so much.


Look at this adorable dress made from a man's dress shirt!
These are from Make it and Love it (check out the awesome list of DIY re purposed clothing projects like this)!


Or how about these little leg warmers made from a sweater (works with scarf too)!

Shirts to skirt and leggings...(all available at Make it Love it blog).

There are also lots of boy and adult clothing ideas on there too. In addition, they have bibs, stuffed animals, pillows, hats... Make it and Love it.

Give your duds a second chance before you toss them!

Monday, March 28, 2011

Peter, Move Your Cotton Tale Aside

What is Easter, besides the mounds of plastic eggs, jelly beans, chocolate bunnies and that blasted plastic grass? My girl is only 2, but she's not too young to learn & celebrate the truth about Easter with us – that is Jesus Christ.
We won't deny her the whimsical and fun events that surround our basic holidays- as we feel this is truly part of being a child & fun/bonding time for family too.
The Easter bunny can play, but he won’t take center stage. We'll decorate eggs, have baskets, do a hunt and enjoy time with family and friends doing the same. I look forward to these events and moments together! However, it's our job and JOY as parents  to make sure everything ‘pretend’ is merely a celebratory accessory to the true meaning.
For fun reading material, I found these great books for children on the real meaning of Easter. I love that this books teaches of the Easter gift, given to us!

At this age, the entire events cannot be fully understood...but the entire message can be told and celebrated in a simple way to begin with. We are planting a seed now, and with nurturing and attention it will become a strong oak tree! This is what I want and pray for- more than anything for my girl.
I love that this book tells the story in a short, illustrated and fun way.
 I know there are likely many great children's books out there that do a great job, these two just happen to be my favorite so far.
There are so many fun games and crafts that are based on the true meaning. Here are a few of my favorites (FREE projects, print outs and more...click links):
DKL . This site is our very favorite, for all kinds of freebie print outs and craft ideas no matter what the occasion. This is the specific link on Christian Easter coloring sheets, games, puzzles and crafts.
Daniell's Place  Love the palm wreath, the Easter garden and the spin game on here!
Christian Preschool I like the resurrection egg craft and they have many great ideas/ free printables too!
 Resurrection Cookies This isn't a craft, but learning as you make cookies. Each ingredient and step matches to events. The oven door is taped shut and kids break open next morning. Here's a detailed pictorial and instructional from a blogger that I liked very much as well (Trina). I plan to play with the ingredients a little, but the learning concept is pretty cool.
For real reading, here’s an accounting of the true events of Easter as documented in the Bible:
Matthew 26:14-75, 27:11-66, 28:1-20
Mark 14:10-72, 15:1-47, 16:1-8
Luke 22:1-71, 23:1-56, 24:1-53
John 11:45-57, 12:12-50
Reading this to a toddler (zzzzzz...Bueller, Bueller...anyone?)...eh, not so much.  However, I like the idea of reading SHORT pieces of this every night (marking where you left off each time), during the weeks leading up to Easter!
What are some of your favorite Easter books, crafts and family traditions?

Monday, March 21, 2011

Let the Music Play!


You don't have to be Barney, KinderMusik or Bono to involve music in your child's life.

I won't re-write a bunch of stuff on how fundamental music is for development ...it's already been thoroughly written about.  If you want to read about it click HERE or HERE or HERE, some great write-ups and helpful tips all over the place.

We have some children's instruments (a floor tom, bongos, wood xylophone, sand blocks...) Our favorite place to purchase professional quality children's instruments  (lasts for years) has been  Groth Music, great prices and great customer service too. For my girls 2nd birthday, we had a jam session with her friends. It was so much fun!

What's even more fun? Here's an economical and FREE way to jam with your tot & learn that other things can make music too!  


Rubber bands and boxes for easily made guitars. This was fun and super easy to do. Here's a tutorial on how to make this easy rubber band guitar. You can use any kind of box really, not just a Kleenex box.


The Tone Ranger!
Fill glasses up with different levels of water for an assortment of tones. If you do this one, you have to really teach your tot to strike gently, it's a great skill to practice together. My girl loved this one...now she tries it at the dinner table on our glasses of milk (ruh-roh). :)


We made this rain stick/shaker from an egg carton. Just put buttons or dried beans inside  and tape it shut (make sure you use a strong tape, like packing tape or duct tape). My girl is interested in how the buttons fall between each slot and she likes to watch them all collect at the bottom (after lots of shaking, of course). So in this case, a clear egg carton works well. Just about any container will do for making a great shaker.

And let's not forget the classic pots and pans for drums!

Check out this great site/ link for a list and easy instructions on different kinds of DIY instruments.  http://www.nancymusic.com/PRINThomemade.htm

We really like Kindermusik, but the classes are pricey. So, we found some Kindermusik CD's and books on Ebay and Craigslist & we use them at home with friends (we also pass them back and forth between  us). The library is a GREAT resource for free  music program books & CD's too. I like this format because they incorporate a story, the music/lyrics, the action/movement instruction, and often a coordinating craft as well.

It's easy to make a music time/class slot at home - together once a week or more if your time allows (doesn't take much time at all!). I think the benefits are pretty big, plus it's great for bonding/ creating fun memories together!

We also listen to a lot of music at home as well (aside from banging on pots and pans)... in the background at home or in the car. Not just kid music, but mom and dad music too!

One of our favorite children's albums is Ziggy Marley's Family Time, and we love the entire  World Playground series of music . We also love Cedarmont Kids Toddler Bible Songs. Lots of variety is a good thing and there are so many great children's albums out now (that are liked by parents too...not cringe worthy).


Happy music making!


Wednesday, March 16, 2011

Time for a Book?


A while back, I grabbed this book for $1 at a local thrift store. A vintage large scale board book for teaching time, with a play clock on the cover. It had some minor damage to a few pages (just age related), so I didn't feel bad for what I was about to do to it.

Turn it into a real working clock for my girls room.

Total project cost around $7. It took me under an hour.
Super easy. I wouldn't lie to you.

I picked up clock hardware at a local craft store for $6, here's the before picture. Check the bottom of my post for inspiration on other books you can use for clocks. You can do this to ANY book (doesn't have to be a children's book).


Tools I used: Box cutter, needle nose pliers and a screwdriver. I used some paint for the new clock hardware because I didn't like the bright gold it came with (I brushed the hour, minute and second hand with green and purple acrylic paint).


I used the screwdriver & needle nose to pop out the old clock hands. I then used the box cutter to cut a square opening for the battery insert. I went a few pages deep. Once cut, I just inserted the hardware per the instructions & popped in the battery. That easy.


Since I plan to display this propped opened on a shelf,
 I left it just like this.

If you want to make one that hangs on the wall, you can put the insert through the very back of the book. Depending on how thick the book is, you may have to remove some pages and glue the book shut.


Here are some other book clocks I found online:
The Chocolate Rabbit, from Etsy Shop (BookClock)
Check out their store for many different kids of book clocks!


Here's one courtesy of LifeHacker.com They used stick-on numbers for the face of the book.


How cool are these three by Hilda Grahhnat?!
A lot of books at your local thrift store are fairly attractive (like these) after you remove the dust cover.

Here's one from Flavorwire.com


Here's another cute one. You can skip using numbers all together, use sticker/decal numbers, paint them on by hand or buy small wooden numbers at your local craft store. 

You can even save a few pages from the book and frame them as accessories to go with the clock. They make great personalized/unique gifts too!