Monday, April 8, 2013

A Wine Garden!?


So we live in the burbs, where big gardens are 'prohibited' via an HOA. :(
This year, we are trying out a wine box garden method! I also plan to sneak a small 'raised bed' garden out back, but this will do for now...to get us started.

I got this wine box idea from LLH Designs and their lovely post on 'how to'. You will get lost on her blog site, she's a really inspiring lady.

We picked up some wine boxes from a local liquor store for FREE!

We have yet to drill holes for drainage or to seal them yet, but we plan to!

For 'starters' we had to make starter plants.
 
We like to use recycled plastic containers to start our seeds.


Here, we used egg cartons, lettuce cartons and a little cherry tomato carton!
 

We had some of those jiffy starter pellets left, so we used those & then some garden soil when we ran out.
 

We left them outside in our wine boxes to soak up some sun, watered... and the beans sprouted fast!
 
I hope to get the bean tee-pee started early, last year didn't work out so well.
See our post here on that fail!

Here is a fun and FREE garden marker template to make! How cute are these?
You can print them, stick them between two clear garden stones or put them on sticks!
 
Inspire by reading gardening books too! We love 'the Surprise Garden' by Zoe Hall.
 

Here's a fun animated video of this book!
http://www.youtube.com/watch?v=lr66Gt4xs5Q

There's also a FREE lesson plan from Scholastic on this book, found HERE.
Here's a fun project and free printable from Crayola. A garden mobile.

Of course, leaving one box for the girl to 'play in'...
 
 
Growing Zinnias in her little yellow garden area.
We will probably convert this into a larger fairy garden for her to play with in a few months, once the flowers start blooming!
Here's our simple Fairy Garden from last year.
 

What mom wouldn't let her kids play with wine boxes...once they have been properly emptied,
 that is !?  :)


Sunday, March 24, 2013

Back by 'Poplar' Demand! Chalk Doll House


I love a good doll house. My girl has been blessed with two of them. If you missed my first doll house makeover post, here it is...Extreme Home Makeover, as featured on Ohdeedoh/Apartment Therapy.

That is really her proper doll house, it gets a lot of play time. That's why I thought it would be 'okay' to do something different with the other doll house she has.

This little gem I found secondhand years before I was even married or had babies.


It reminded me so much of my then current house, a Cape Cod style house. It was on 'Poplar Drive' This is a picture  of my old house in Spring. I absolutely loved that Poplar tree!


Here's the inside of the doll house before, as you can see...I started painting the inside with chalkboard paint. They make all sorts of different colors of chalk board paint. However, in my opinion, only dark colors work well with chalk. So, it was going to be blue, purple or black. I settled on purple.


I did stencil on a few embellishments in white paint (chandelier, and a fancy emblem above the window).


As you can see, there will be an infinite number of design possibilities!!
 
Here, my girl draws on some curtains...


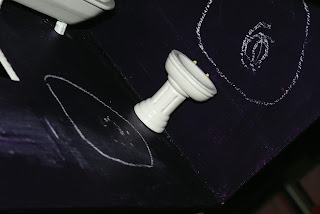
a mirror and rug in the bathroom...


she was loving to make rugs!


 Adding clocks, pictures, lamps (even a ceiling fan with a balloon stuck in it, just like home).


I made a simple eraser (that also holds the chalk when not in use) out of foam and fabric. Kind of like a mini pillow really.
 
Colored chalk would be fun too!
There is a lot of chalk dust, but isn't there always dust in a home remodel?

:)


Monday, March 18, 2013

It's Water Poof!


Here's a fun and easy project we did the other day. We had a leftover paper 'poof' or 'pouf'...or 'tissue ball', whatever you call them! I had picked up a variety colors package at a local craft store a while back (used the colored ones for bedroom decoration)... and we ended up with one  extra, lonely white one.

Oriental Trading Company sells them too. You could also make your own using tissue paper poof, there are lots of DIY tips online to be found.


Since these are made out of tissue paper, I thought using a dropper with water colors would be fun!
We love these water colors from Discount School Supply, they last forever (mix with water).
 
 
Use some droppers, any kind will do (medicine droppers too)!
 
 
Drop lightly on the paper and watch the color absorb/spread!


We weren't very patient, when finished painting- we dried ours with a hair dryer.
We then unfold the poof carefully & admired all the colors and patterns. My girl said something like "WHAT? Is this magic??"


We then continued to unfold & fluff. There were areas that tore easily because the tissue paper was so delicate, but we didn't mind!
 

We then attached ribbon and hung from the ceiling in the art room.


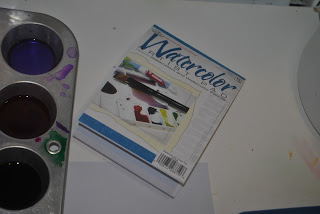
Next, we tried to use up the rest of the already poured water colors. These $1 water color pads at a local craft store (Joann's) are a fantastic value and they work great.


Some more dropper fun...a few small drops...

Fold...
Surprise!


 Lots of fun!


Tuesday, March 12, 2013

The Title Says It Doll


I haven't posted in quite a while, so I'm playing a little catch up by posting older projects we've done!  My girl was gifted an 18" doll for birthday (and one for Christmas), so I thought it would be great for her to have some furniture and extra clothing for them.

The American Girl furniture is so nice, but way out of our budget!
I found these gems at a thrift store. An old bathroom cabinet, a foot stool and some doll chairs.
I spent under $20 on all pieces.

 
I was then gifted some wicker doll furniture from a friend, so I used those as well. 
Here's the AFTER picture (below).
 
 I used spray paint, stencil on the stool/table (Zinnias sold at Hobby Lobby), an adhesive mirror (sold at Hobby Lobby), new drawer pulls (found at Hobby Lobby).
I also used an old candle holder and a wood circle to make the dessert stand.

and my favorite part, AWESOME fabric for cushions and a pillow
(from sara jane studios, she has such LOVELY and fun fabric collections)!
Kids at Play, cutest ever!
 
 
Then, on to make some outfits. This ruffle thing WAS my daughters old baby swimsuit
(and baby shoe) turned into a dress and purse. I think the shoe still looks like a shoe, but my girl was thrilled with it as a purse & that's all that matters!
 
 
Here, I simply took an old sleeve (bell style) from a velvet shirt and used fabric glue to attach the shiny silver fabric for tying.No sewing, no zippers, buttons or velcro! Seriously took 10 minutes.
 
I took an old terry cloth hoodie/jacket and made it look like a bathrobe and towel for hair.
I basically just cut and added velcro, that's it.

There are LOTS of inspirational sites for creating your own doll clothing out there.
Doll Diaries is an amazing site with many tutorials on how to make many things for your 18-19" dolls.

American Girl Doll Play is also a wonderful DIY site. Check out this sweet lemonade stand they give instructions for (image belongs to American Girl Doll Play)!