Tuesday, October 25, 2011

Fall Garland


Here's an easy fall garland project we did the other day.
We went on a leaf hunt around the yard & spread them out on the counter.

To preserve them, I ironed them between two pieces of wax paper.

Carefully peel the paper to remove the leaves.

Here they are, all pressed and waxed.


Next, grabbed some ribbon and used glue to attach the leaves face down.

Hang and enjoy. If stored carefully, they will last for years!


Tuesday, October 4, 2011

Extreme Home Makeover- Dollhouse Edition


My lil' girl will be turning 3 soon. I can hardly believe it. At this stage, she's loving to play with dollhouses. My kinda girl!

I found this lil' treasure on Craigslist for $30. What a FIND!
It was FULL of furniture too (more than shown in the picture)!


All it needed (okay, didn't really 'need', but I couldn't help myself) was a makeover. One that wouldn't cost much if anything at all. So, using mostly supplies already on hand...I got to work. Total project cost, including the dollhouse: $62.

Here's the BEFORE & AFTER of the dollhouse.


The cherry furniture was lovely,but I spray painted it all. Yep.
I covered the walls with craft paper (using spray adhesive).

Basically, I used everything I already had on hand - EXCEPT I did splurge on a new kitchen  $20, a cute little washing machine for $6 and some craft stickers $6. I just had to do it.
This dollhouse is for me too, you know.


 We love owls. This is the little girls room. I used craft paper for the walls, leftover fabric and some craft stickers. The bed and dresser were originally that cherry wood- but nothing a can of spray paint couldn't jazz up!
The living room. 
Craft paper walls, little craft silhouette stickers (I do not scrap book by the way).
Painted couch with zebra felt (used fabric glue to adhere). Painted chair with leftover fabric.
 I printed the chandelier image from the Internet, cut it out and glued it to the wall.
Spray painted fireplace. Fabric scrap rug. Craft paper walls.
The kitchen.
I used an old picture frame mat for the window (magazine cut out for the scene), painted table and chairs and craft paper for walls and floor. Printed out and glued 'Eat Together'  picture to the wall.

The laundry room (I wish I had for real).
Craft paper walls, parts of the old kitchen furniture painted and printed out laundry stickers for pictures. I just had to buy that lil' washing machine for $6. We are calling it our washing AND drying machine.


The bathroom.
Painted furniture, craft paper walls and a printed out picture- glued above the tub.

Bedroom.
Spray painted bed and cabinet. Cardboard headboard with leftover fabric.
Leftover fabric for artwork. Craft paper walls.

Best part is watching my girl play with it.

There's nothing in here that I'm worried about getting broken or messed up (remember, we only paid $30 for it). If she wants to put the stove in the bathroom- sounds like an adventure to me! Sure, I spent some time on it- but it was fun for me to do. Plus, if things get messed up too badly, I'll always have these pictures to remember how things were!
Case in point. It was bath night for EVERYONE this night (including pets).  
Proud of her for conserving water!
 

Friday, September 30, 2011

Fall Inside!

Ah, Fall is here. This is my most favoritest, bestest time of year. The trees are beginning to change into jewel colors of yellow, red, burnt orange...time for nature walks and collecting.

Bring some Fall inside!

Today, we patrolled our backyard and snipped a basket full of fall foliage from trees and bushes. I simply added water to a vase and plopped them in. Now we have a little bit of Fall inside to enjoy.


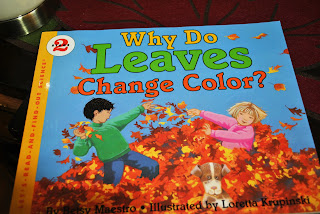
A great book to read to your kiddo...Why Do Leaves Change Color? A fun and beautifully illustrated book (with some detailed scientific info too).  


Also, a quick and easy project we did with friends this morning ...laminated place mats using Fall leaves. You could also use contact paper if you don't have a laminator.


Since this is my favorite time of year, there will certainly be a few more Fall inspired posts to come.

I hope everyone is enjoying this Season!

Wednesday, September 14, 2011

Buried in Berries...Jamberry!


has been a favorite book of ours for a while.
If you haven't read it to your kiddo yet, make sure you do!

Here's a fun  and very simple activity we did to go with this board book.  

 We used strawberries, blueberries, blackberries and raspberries.
Last of the fresh berries for the season. A farewell bash.

Rinsed 'em.

Sorted 'em.

Next, we read the book and used our berries as interactive parts to the story.

One berry, two berry, pick me a blueberry.
She picked a blueberry and fed it to the bear.


                                               Three berry, four berry,hayberry
 Strawberry!

It was hard not to sample the berries as we read along. 

Blackberries!
Trainberry, trackberry, clickety-clackberry!
I'm okay with getting a lil' berry stain on our book.
It's ours and we'll remember how the stain got there. :)

Next, raspberries!


Buried in berries!

She enjoyed all the berries 'as is' in natural form as we read...EXCEPT for the raspberry, too sour for her liking (same here...*pucker face*).

Next, we conducted a taste test with different dips.

Cream cheese, vanilla yogurt, honey and chocolate whipped cream.

Turns out that ALL the berries were best in chocolate whipped cream.

There's a resource book called  'Story Stretchers' that we like very much. While I didn't get this activity from that book, it is a great resource for adding relevant activities to your favorite books/stories.  They have a version for infants, toddlers, pre-k and up.


Thursday, September 8, 2011

Where the Wild Things Grow


I was out rummaging with some girlfriends last weekend, hitting up area shops - looking for treasures. I found this little coloring book for 50 cents - A Field Guide to Wildflowers (in the fields, wetlands, sand, woods). A treasure.

We have an open field near our house, it's always knee high with weeds and wildflowers.  I thought this book would pair well with a fun Montessori style study on wildflowers, arranging and parts of the flower.


We found and identified Bull Thistle.
It's prickly, be careful.
We found lots of Goldenrod.

We found a variety of other wildflowers as well and it was fun to match them up with the pictures in the book. The majority of what we found and studied were late summer bloomers, which worked out perfectly.


Next, thought it would be fun to arrange them.
Who knew weedy wildflowers could look so pretty?
Some wildflowers can irritate the skin easily, so we were careful when handling the wildflowers and we washed our hands after.

I added some FREE printables to our study, great way to learn the parts of a flower.


This flower book is also from HomeSchoolCreations.com A fun flip book about shapes and colors. I laminated them, punched them, added an eyelet and ribbon to keep 'em together. I suggest you take a cruise around the free printables they have, there are many preschool packs that are just adorable!


While we're on the subject of flowers...did you know that a toothbrush holder works great for flower arranging? Especially for little hands! This is an activity we did months ago, but though it relevant to add to this post. Here, we used two Dollar Store toothbrush holders (no plug or openings at bottom). Works perfectly!